Written by Neil Bryant for the URC
I’ll be honest, I had never heard of Skimo till three or four years ago when a certain Kilian Jornet exposed it to me. Not personally of course, but I imagine there are a fair few of you reading this that were in the same boat. During Summer Killian is an incredible trail/mountain runner and in the Winter he swaps his running shoes for his ski boots, skis and skins, coming down even quicker than his summer descents.
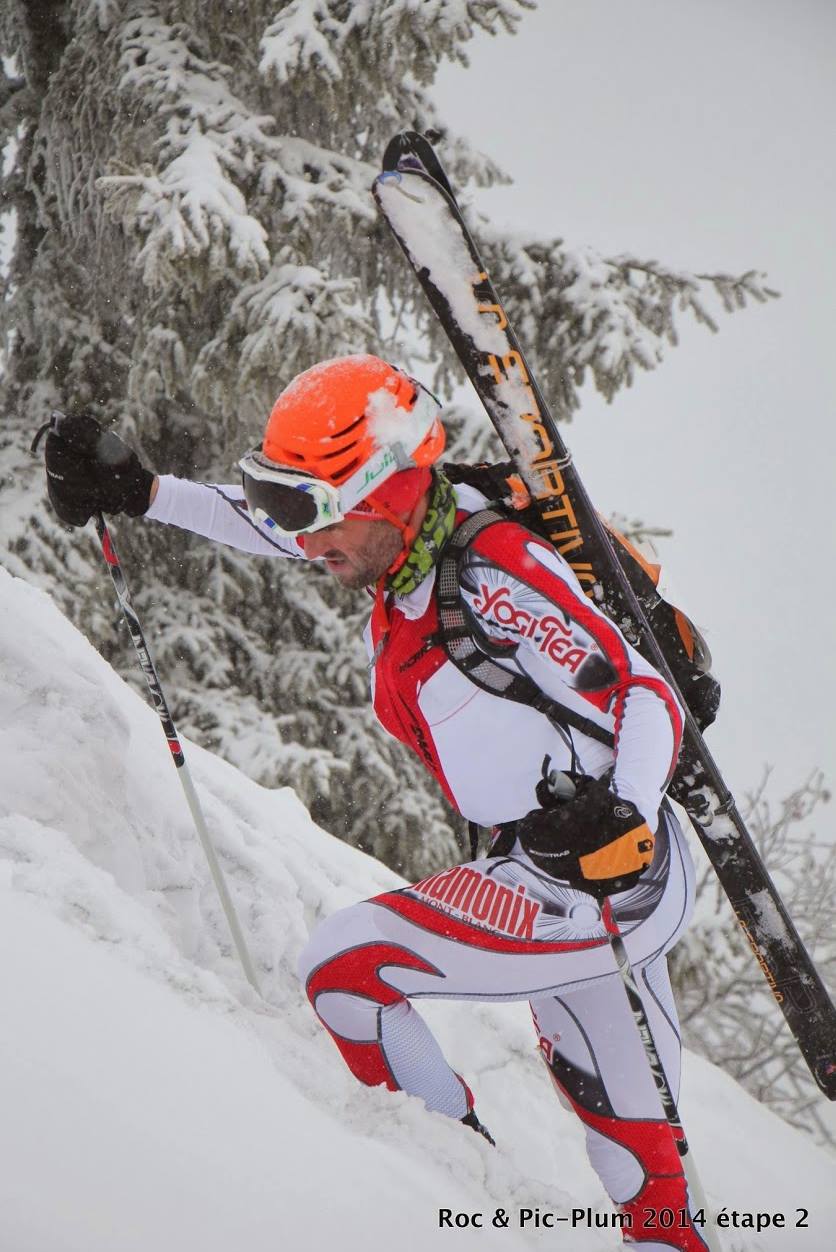
For me this was a world I literally knew nothing about and because it had this European exotic edge to it I think I was even more attracted. I had never skied in my life and had only spent a week snowboarding about 12 years ago. I was living in Bristol with no real skiable mountains in range so I think I had accepted I wouldn’t be getting into it seriously.
Life changed, and suddenly, or so it felt. I had moved to Chamonix as I wanted to escape my old job and life and more importantly, I wanted to be in the mountains.
I have now been living in Chamonix for over two and a half years, and our third winter is about to start. It has taken me a while to pick up the basics, but I now can go out and really enjoy myself while also getting an amazing workout. I also don’t need to use the lifts! It is fast (though not always!), liberating, exciting and takes you to some staggeringly beautiful places that nothing else can. You can do stuff that is simple and safe such as skinning up special skinning tracks and descending down pistes while at the other end of the spectrum more exciting stuff takes you far away from the crowds to the wild backcountry where there is a danger of avalanches and falling down glacier crevasses. Navigation, safety and reading the snow and weather makes the whole experience quite involved and incredibly rewarding.
Running is so simple in comparison, but there really is a crossover point that draws these activities together. It’s great to use the harsh Winters in the mountains rather than fight it.
What is it then?
So, if you are not sure, what actually does it mean, and what does it entail? Skimo is just a mix of Skiing and Mountaineering and is basically that. You would perhaps have a peak as an objective or you’ll just be going up a track and back down. The ascent is done in a number of ways, primarily though it will be on your skis which have special attachments which allow your heel to be free and skins on the bottom of your skis which are so named as seal skins were originally used. Skins glide easily forwards, but grip going backwards, making ascending possible. If conditions are a bit iffy then you can attach ski crampons which add a little bite. When it is too steep even for skinning, then the skis are mounted on your back and the bootpack commences. Bootpacking is just hiking really, and again if the terrain gets more technical, then boot crampons are utilised.
Of course beyond this is ice climbing etc. It is endless. Using skis means you can make the base of a winter climb (and return once complete) LOTS quicker.
Then of course, there is the descent which I don’t need to go into great detail about. An hour of hard graft to get to the top means you can be back at the bottom in 5 minutes. I imagine most of you have skied so will know how thrilling this can be! One of the great things about skimo, is the fact it can take you to some great places and that includes great descents with fresh powder!
What skills are required?
So, you have never skied before, could you try skimo? I think it would definitely be best to get some piste skiing under your belt first so there is a level of confidence with the descending. The great thing about piste skiing is it is great for practicing going down of course, whereas if you are spending an hour skinning to the top each time you are going to have less opportunities to practice the downs, not too mention you’ll be exhausted!
Once you are ok with the downs then maybe you can hire some touring skis and boots and find the local skintrack at the resort you’re in and try it out. This would be a great opportunity to get a feel for how it feels to skin (how hard it is!) and to get familiar with the boots, bindings and skins. Once at the top, you will generally be at the top of a piste meaning you have an easy, safe way down.
Equipment
One of the key differences between going running and skimo, is the amount of gear needed for skimo. There is a lot of gear, and depending how adventurous your outings get, you can need more and more. Avalanche safety gear should be carried all the time in off-piste areas, and if any glacier travel is happening, then crevasse rescue kit is also needed. I am not going to go into these areas, as I will leave that to you to discover if and when you get that deep into it. You should attend courses to learn about both.
I will just cover the basics.
Skis
This is the one thing where you can pretty much use any ski. For racing, around 90% of the race is spent going up, so weight is super important. The lighter and smaller the ski is, then generally the higher the skill needed to use it. If you only skin so you can enjoy the down, then a wider, rockered ski more suited to descending is ideal, though of course it will be heavier and wider making the up much harder. So, you need to work out what is your priority and of course what is your skill level. Going uphill is certainly my priority but I have to take into consideration my skill level which is not amazing, so a small, light ski is good, but certainly not a race ski, which I would struggle with on the downs. Like any sports equipment the lighter it is the more it costs. This is also true with skimo gear.
Bindings
There are two main types of bindings here. There is the frame binding which any ski boot can step into, and then the simple and light, tech binding or as they’re often called, the Dynafit binding as they are the company who pioneered the design. These are the most popular, but you do need a boot with the right fittings. My first set of old touring skis had a frame binding, which seemed to work fine. No real complaints, though they can be a bit weighty. My second, and current pair of skis have the superior Dynafits. They consist of a toe piece and a heel piece. The toe of your boot needs the two dimples on the inner side and outer side at the front. The toe piece has two points which fit tightly into these holes creating a solid hold that also act as a hinge when skinning. For the descent you simply set the heel to ski (different models have different methods) then step down which will hold your heel fast. You are then ready to descend (the ankle collar needs to be fastened too).
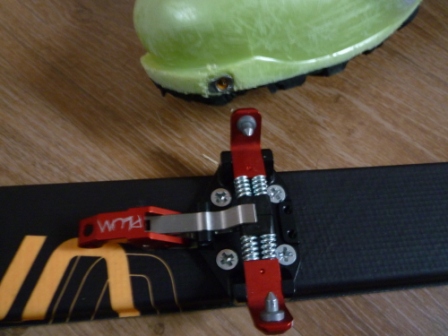
Here is the toe section of my tech bindings. The sharp pins on the ends of the red jaws close when stood on and engage in the dimples on either side of the toe on the boot, pictured just above. This creates a pivot for walking, and a solid hold combined with the heal mechanism for skiing.
As with many things, simplicity is king. As soon as things get too built up and complex, then there is more to go wrong. You really want this gear to be as dependable as possible!
You can see that I am obviously heavily in the tech binding camp, but don’t think that that means that the frame binding is a turkey. It worked fine for me over my whole first Winter.
Boots
Now here is a piece of equipment that can really make or break you. With downhill boots the fit is of course very important, but with touring boots it is even more important as you need them to fit well for the descent, but then switch to allowing your ankle to flex as you skin without letting your heel slip. Not a simple task for the boot manufacturers!
So, just a quick explanation of how the boots work. The boot will have between two and four buckles which will all be fastened when you are descending. When you climb you need the ankle to not be stiff, or not in ski mode. The ankle needs to be as loose as possible so you can have a long stride length that is fluid, this is the walk mode. To switch your boot from ski to walk mode, each boot will differ with mechanisms, but usually you flip a walk mode switch and loosen your top buckle/s/strap which will in turn, allow movement in the ankle. So if you have downhill boots without this walk mode, then they will be no good for skimo!
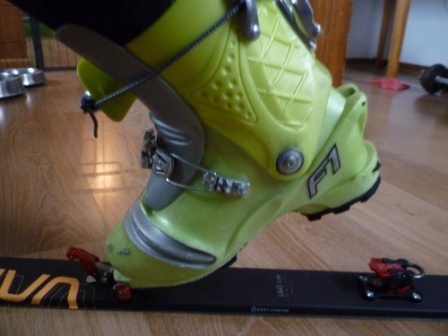
The above picture demonstrates the walk setup. Note the toe being a pivot point, and the string around the ankle being loose enabling ankle flexion.
The type of binding determines what type of boot you need also. If you use tech bindings, then you will need tech binding inserts. Simple!
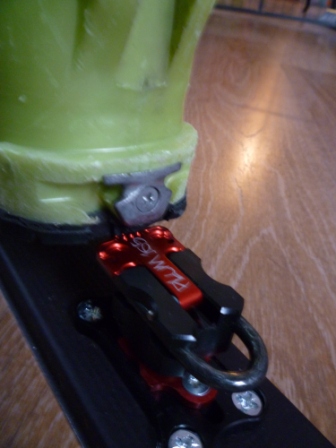
The above picture shows the rear of the boot in walk mode. The red part on top is a flap that covers the pins below which prevent the heal getting locked in ski mode. You can also see the tech inserts on the heal of the boot.
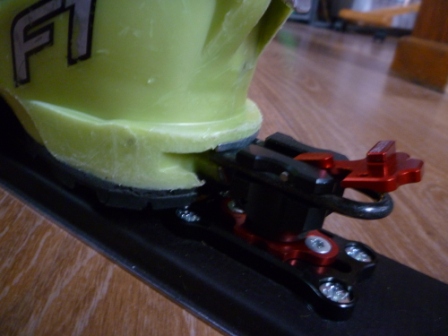
Here is the rear of the boot in ski mode. Note the red flap on top has been lifted to expose the two pins, which when stood upon, lock into the boot.
The boots are where the most money should be spent if you have a tight budget as bad boots are a false economy. You will have to upgrade for your feets sake.
As with the skis, the more you pay, the lighter the boot. Weight for boots which can perform a range of tasks from the uphill skin to performing well on the downs has dropped to around a staggeringly scant 500g per boot now which is just incredible considering the demands put upon them. You could still attach crampons to this boot and climb mountains! Lighter boots are available which fall into more of the fast & light/race side of things but don’t offer quite as much control and support, conversely heavier and stiffer freeride touring boots offer advantages on the downs but can be a pain on the ups.
It is definitely worth getting professionally fitted at a reputable bootfitter too as this is where your foot will be accurately measured and matched to the correct boot. They will then shape the outer shell if needs be and thermo mould the liner which will make it feel like the boot was designed with only you in mind.
A decent tread is also good as more walking will be happening.
Skins
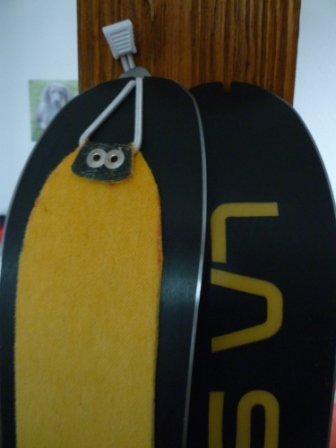
Skins are incredibly simple. they are made from nylon, mohair or a mix of the two, and always with a sticky back to hold them on fast, and to stop snow getting under. As with much of the gear, there are many variations. They sometimes are the full length of the ski other times a lot shorter. It seems that every manufacturer has there own way of connection it to the tip of your skis. For racing, you use elastic at the tip which means you can rip them off without removing the skis from your boots.
The ski on the left has a racing skin on i.e. skinny and with an elastic tip connector for fast removal.
Get out there!
Since writing the preceding text I have taken part in my first skimo race. As expected it was a baptism of fire as pretty much everything technique-wise is rather poor with me, but it was brilliant fun, and I really can’t wait till the next. I need to practice my transitions (ski to walk, walk to bootpack etc.) as huge amounts of time were lost here. My downhilling is not good, but I’m always working on that! My skating is also poor (like ice skating but on skis for flat sections) so I’ll be practising that also. Thankfully my uphill fitness was ok and I actually overtook some skiers, only for them to pass me with ease on the transition and then descent! But I finished with a big grin on my face!
If you have skied before and enjoyed it, then I highly recommend giving it a go. If you have skied before and didn’t enjoy it, then maybe it’s not for you, but I’m guessing that a fairly high proportion of the people who’ll read this, love to keep fit, and love the mountains, so will most probably really enjoy dipping into the exciting world of skimo.
Just remember to be safe out there and respect the snow. Have fun, and maybe I’ll see you skinning in Chamonix this Winter!
If you are based in the UK, then this is an exciting time for Skimo as it has just started to become more organised on a national level with the formation of Skimo Scotland. Check out the site for what's happening and what races there are.


